Part 5: The iOS App
In the previous steps we’ve registered and connected the Auth0 service to the our Postgrest service. In this last and final post we’ll test it using an iOS app.
Configuring and creating an iOS app is out of the scope of this tutorial, but nevertheless it’s quite easy to do using the official guide. To make things easier, I’ve created an iOS project where you can add your Auth0 client ID and domain name, and get started. The project is available at: GitHub/AuthZero.iOS, along with a README.md file.
Once you’ve download the source code, we’ll need to the following information from Auth0:
- Client ID
- Domain name
- Allowed Callback URLs
We have the Client ID and Domain Name from the previous steps when we created the Auth0 applicaton. Add the Client ID and Domain name in the Auth0.plist of the iOS app.
We’ll now add our App’s bundle ID to the Auth0 dashboard. To do that we need to configure the Allowed Callback URLs of the Auth0 application. Go to the AuthZero.iOS appliation we created previously and add the following line to the Allowed Callback URLs section:
{PRODUCT_BUNDLE_IDENTIFIER}://YOUR_DOMAIN/ios/{PRODUCT_BUNDLE_IDENTIFIER}/callback
If the bundle id of your iOS app is com.example.app and Domain name is sleeping-springbock then the call back URL becomes:
com.example.app://sleeping-springbock/ios/com.example.app/callback
This will allow the Auth0 SDK to redirect to the App once the authentication is successful.
Running the app
We can now run the app along with our local postgres setup and verify if it’s working as intended.
Start our dockerised Postgrest service using the following command:
docker-compose up
Note: If you want to start with a clean slate, issue the following command:
docker-compose down \
&& docker-compose rm \
&& rm -rf pgdata/ && \
docker-compose up --remove-orphans
Once the services are started and connected, open the project in Xcode and hit run. The following screens show the app in action.
First start

User not logged in yet
By clicking on “Login” button, the user will be redirected to the Auth0 social login screen. The buttons to POST and GET Amenities from the API will be disabled.
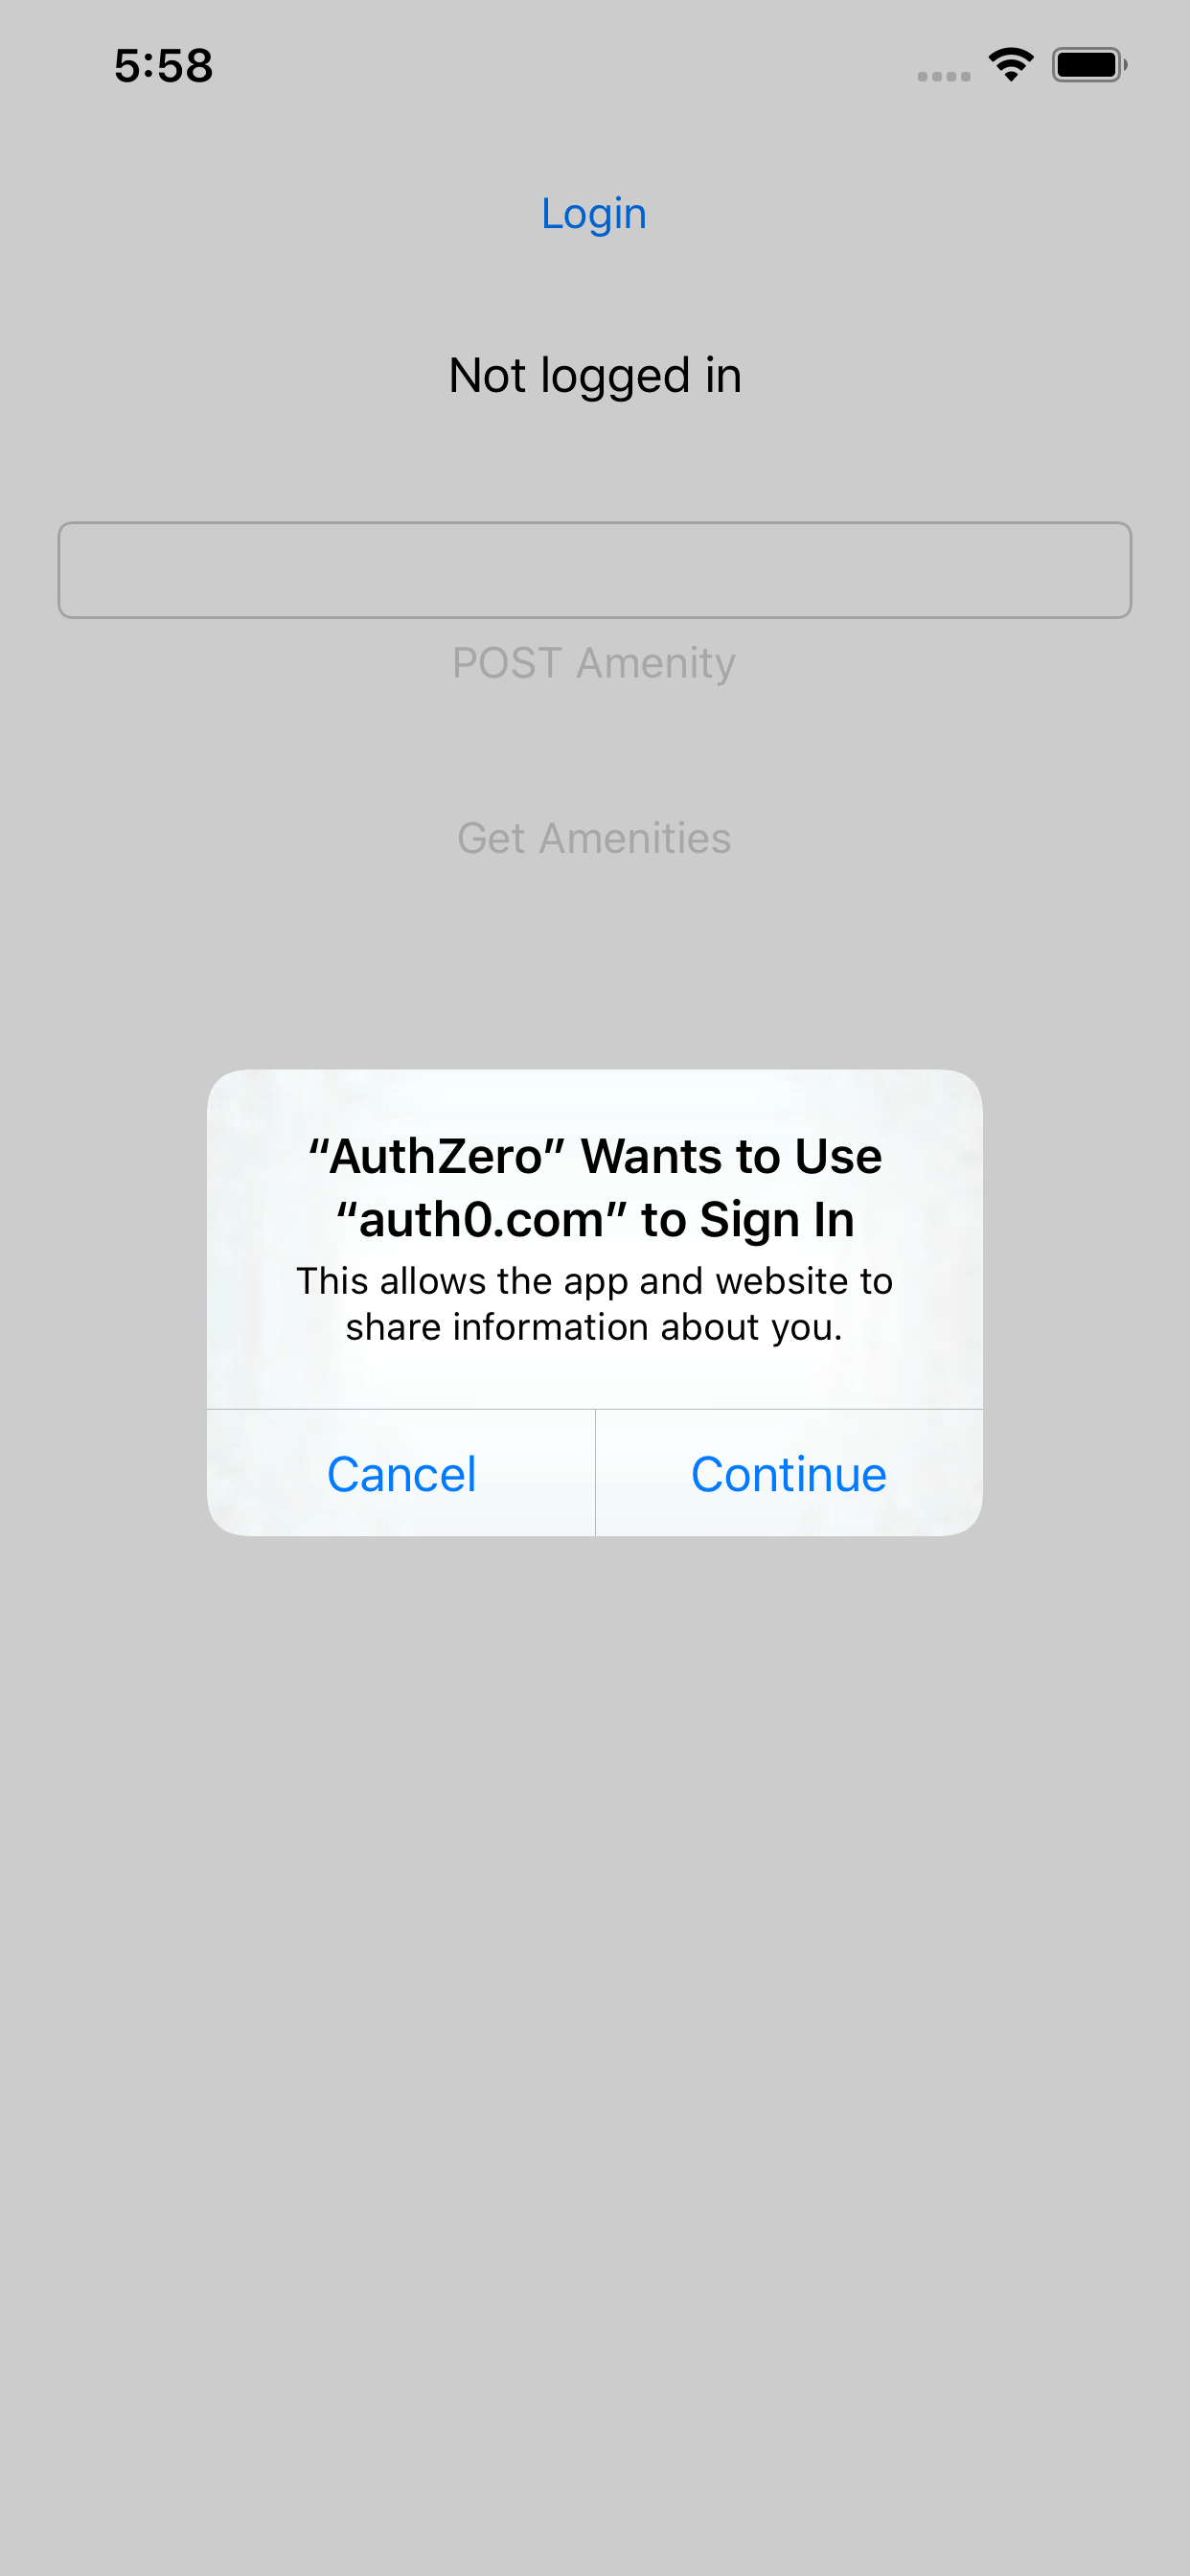
iOS permission prompt for Login
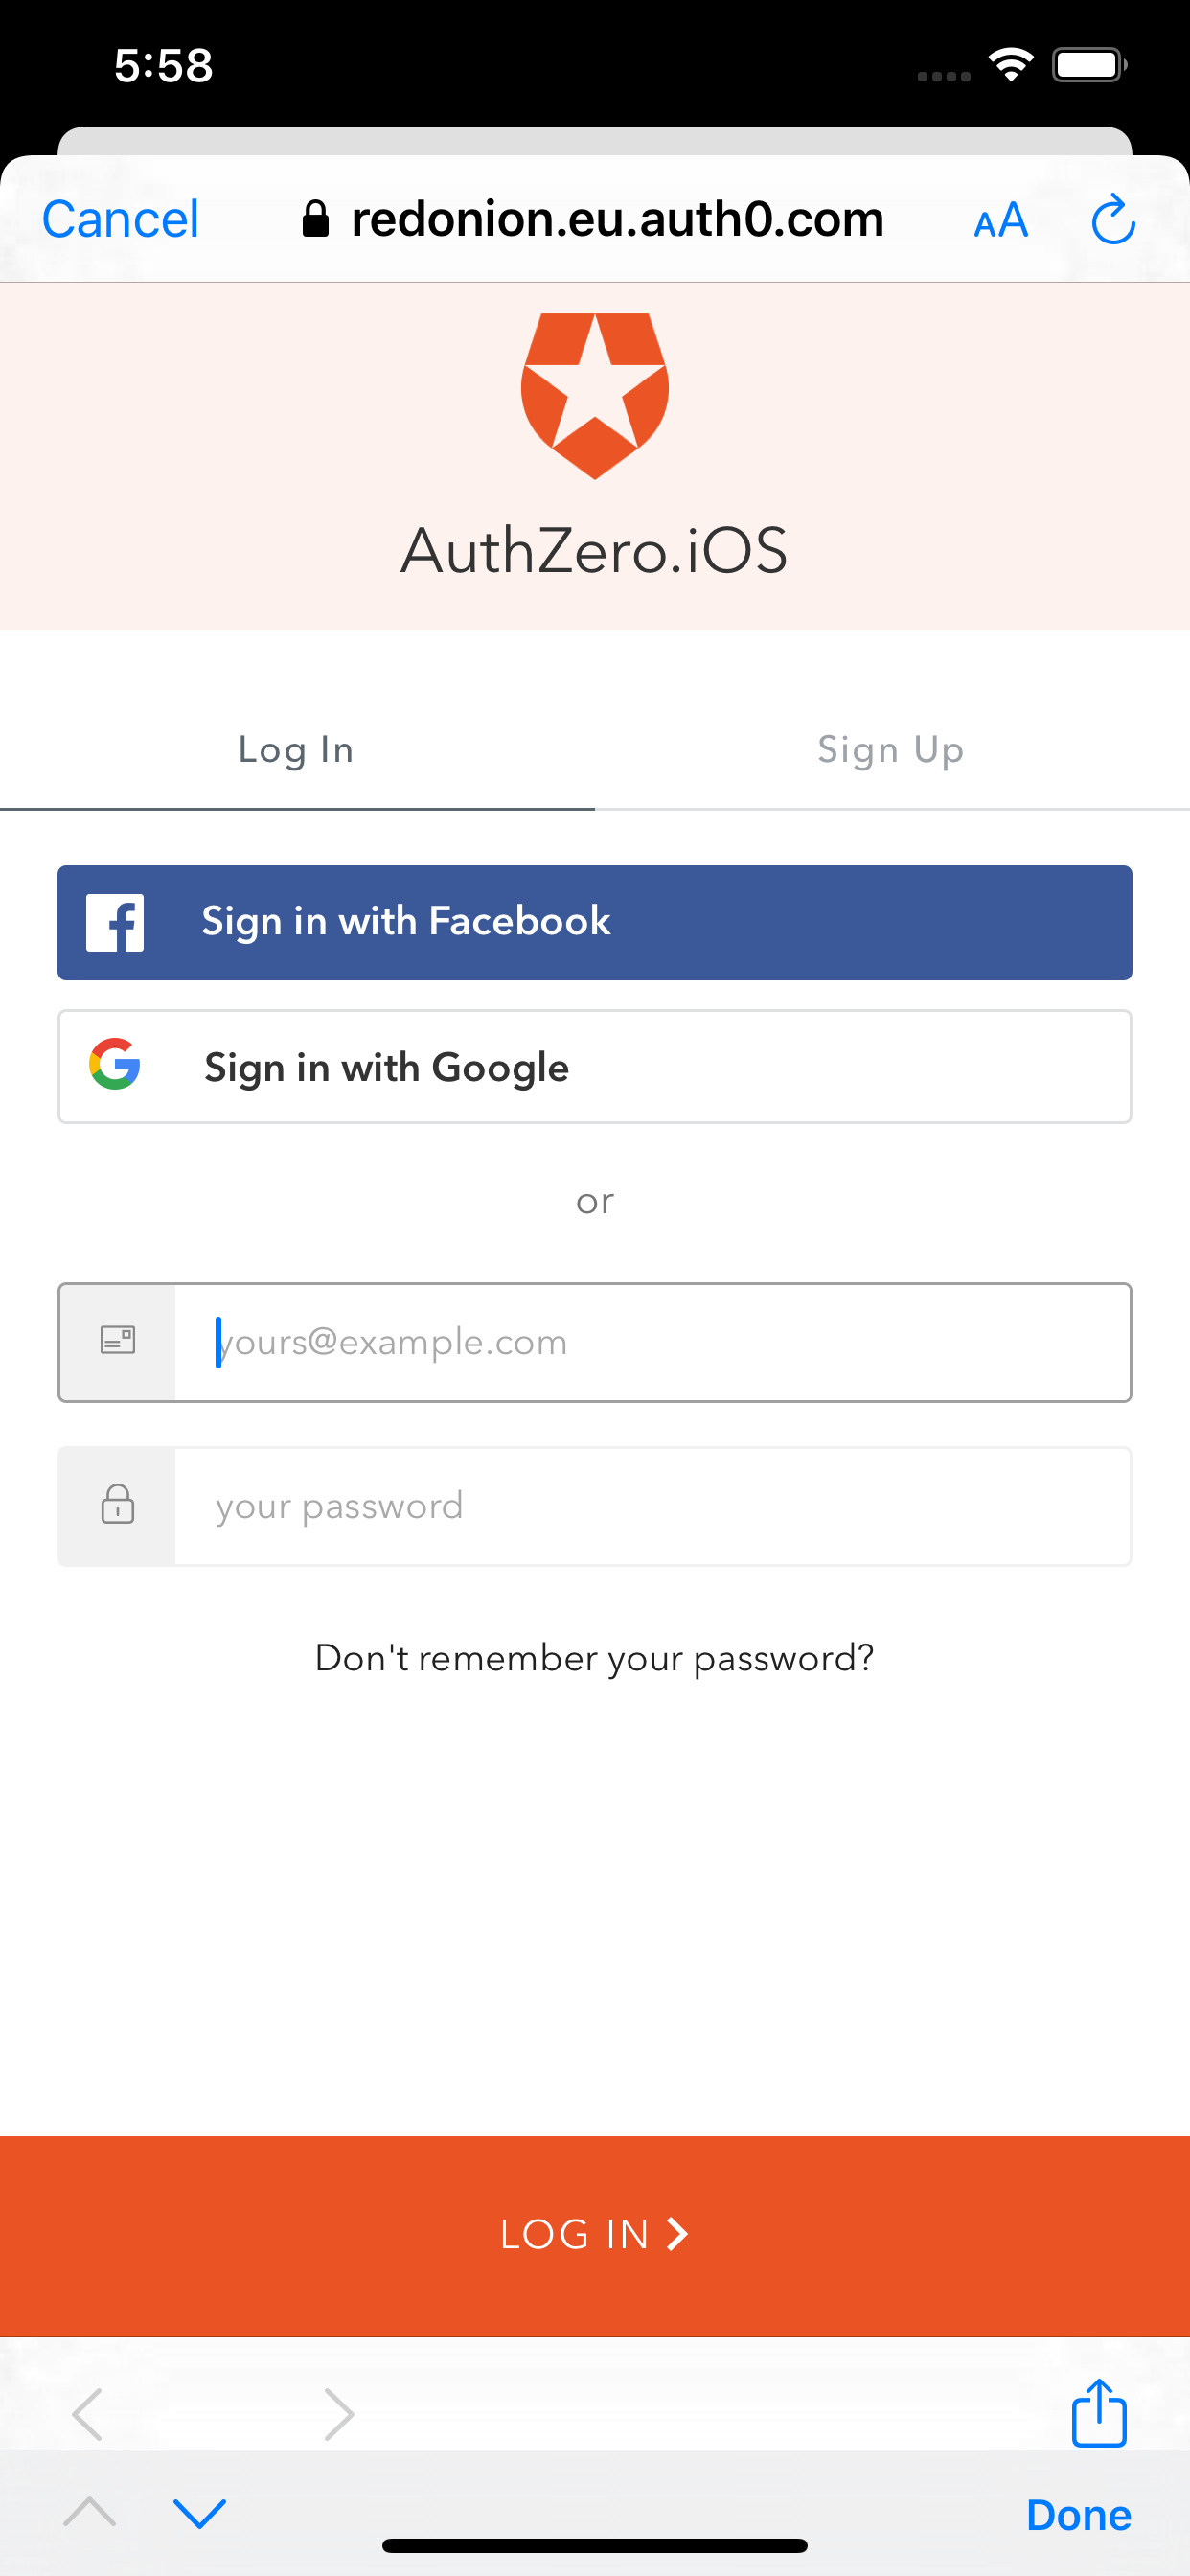
Auth0 Social login page
Click on “Sign in with Facebook”, which will take us to Facebook signin page.
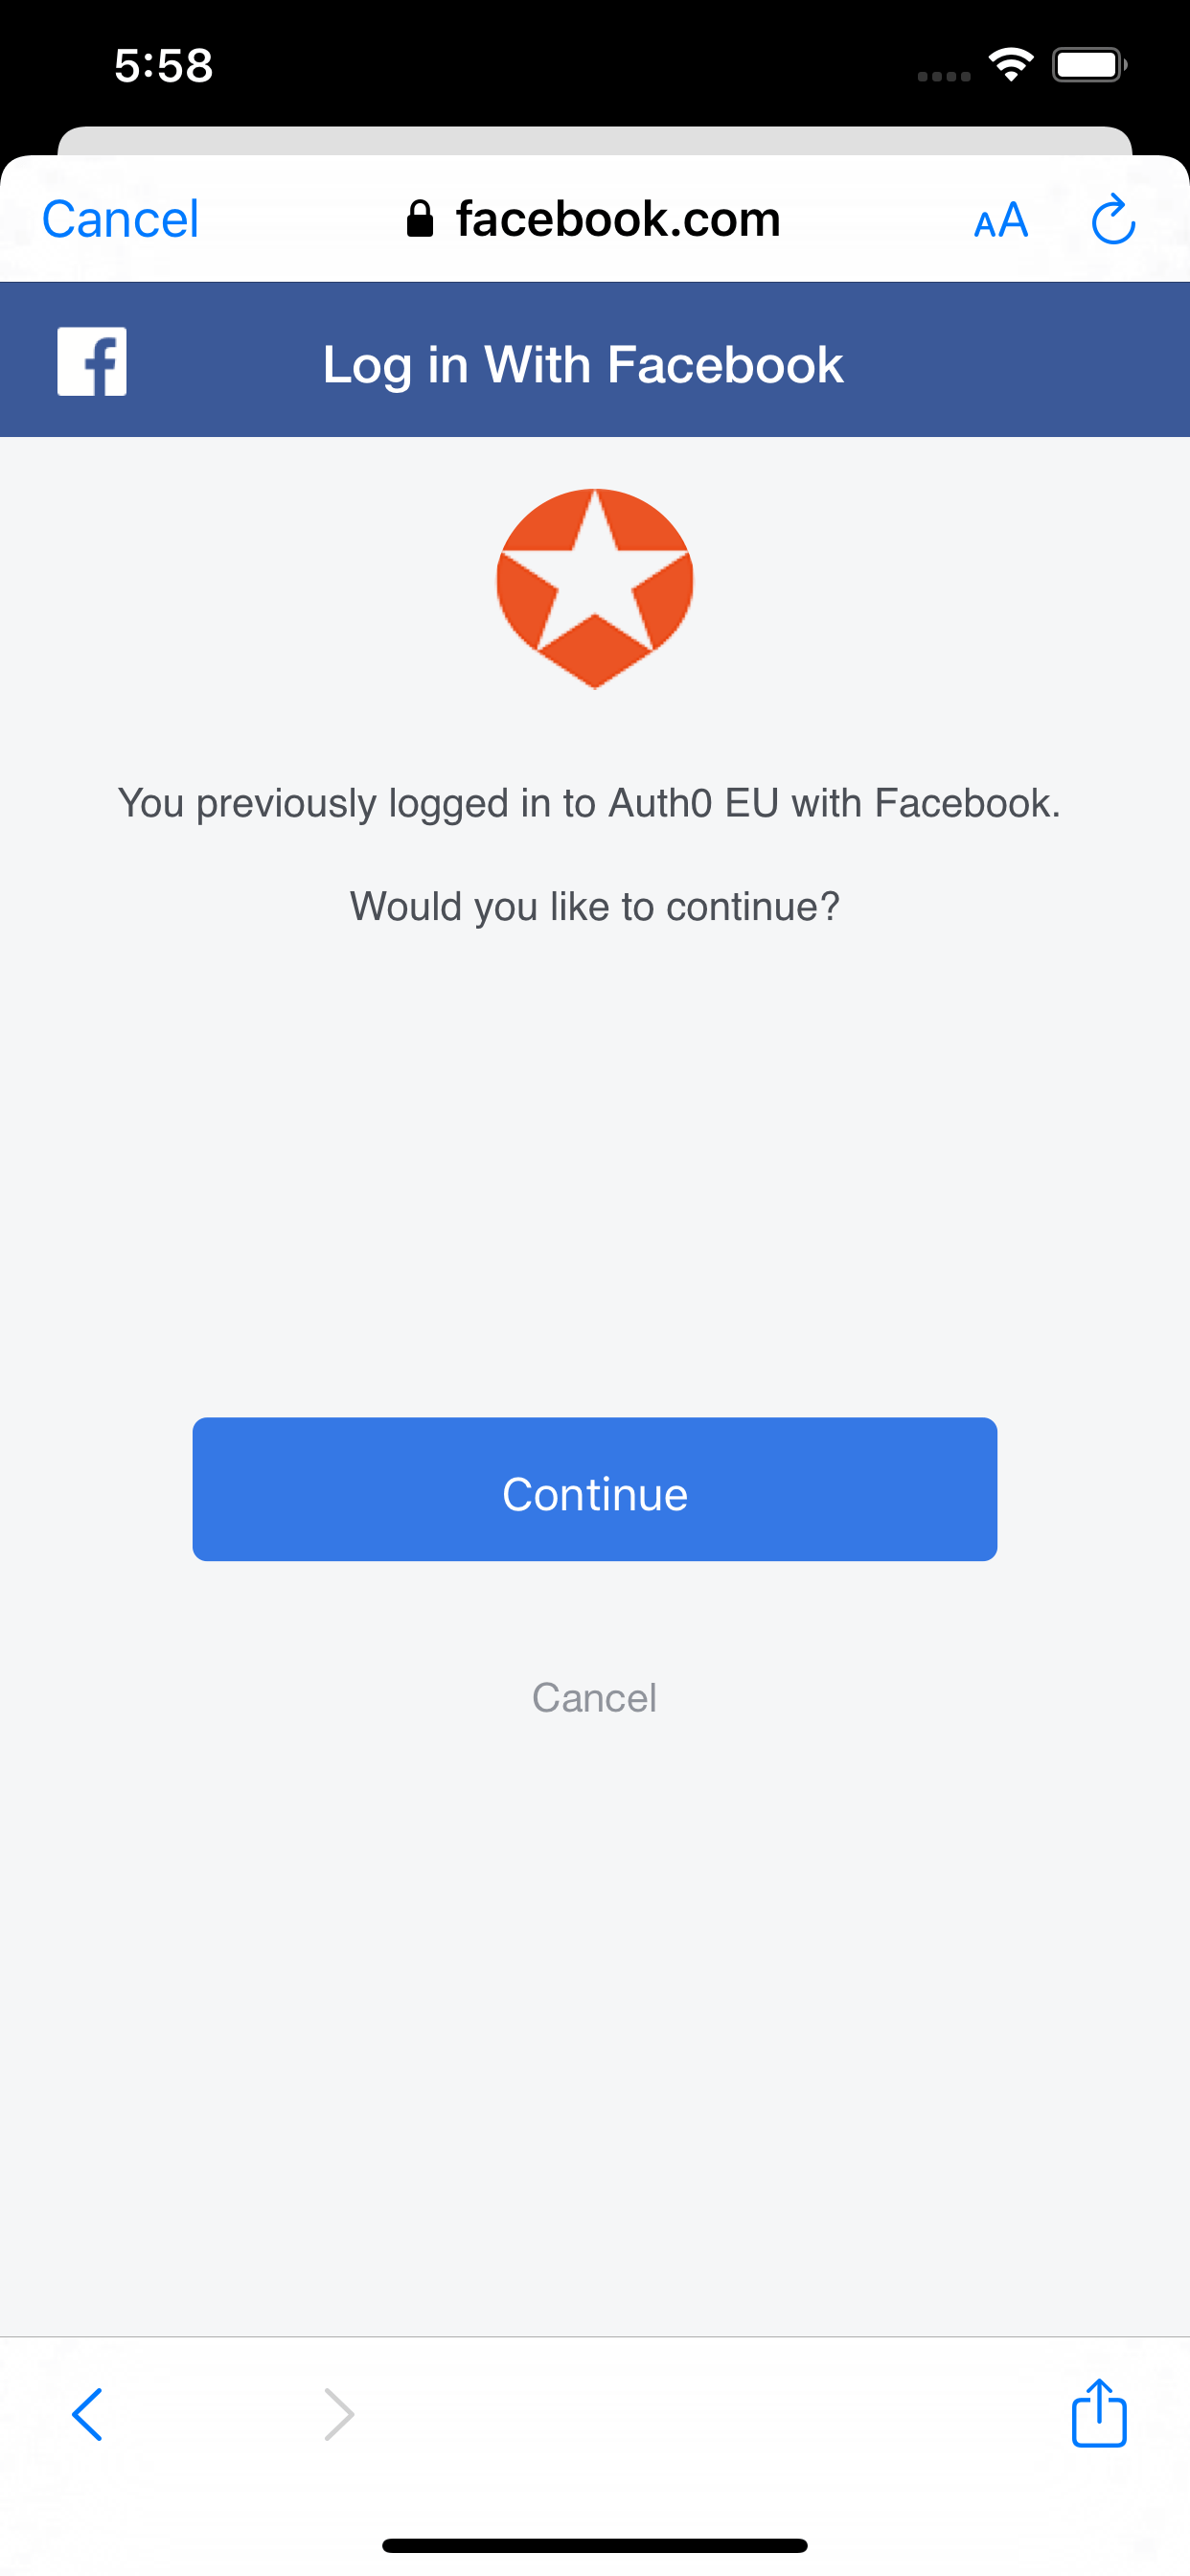
Facebook confirmation
Since I’ve already logged in to Facebook on this device, we see a confirmation prompt to proceed.
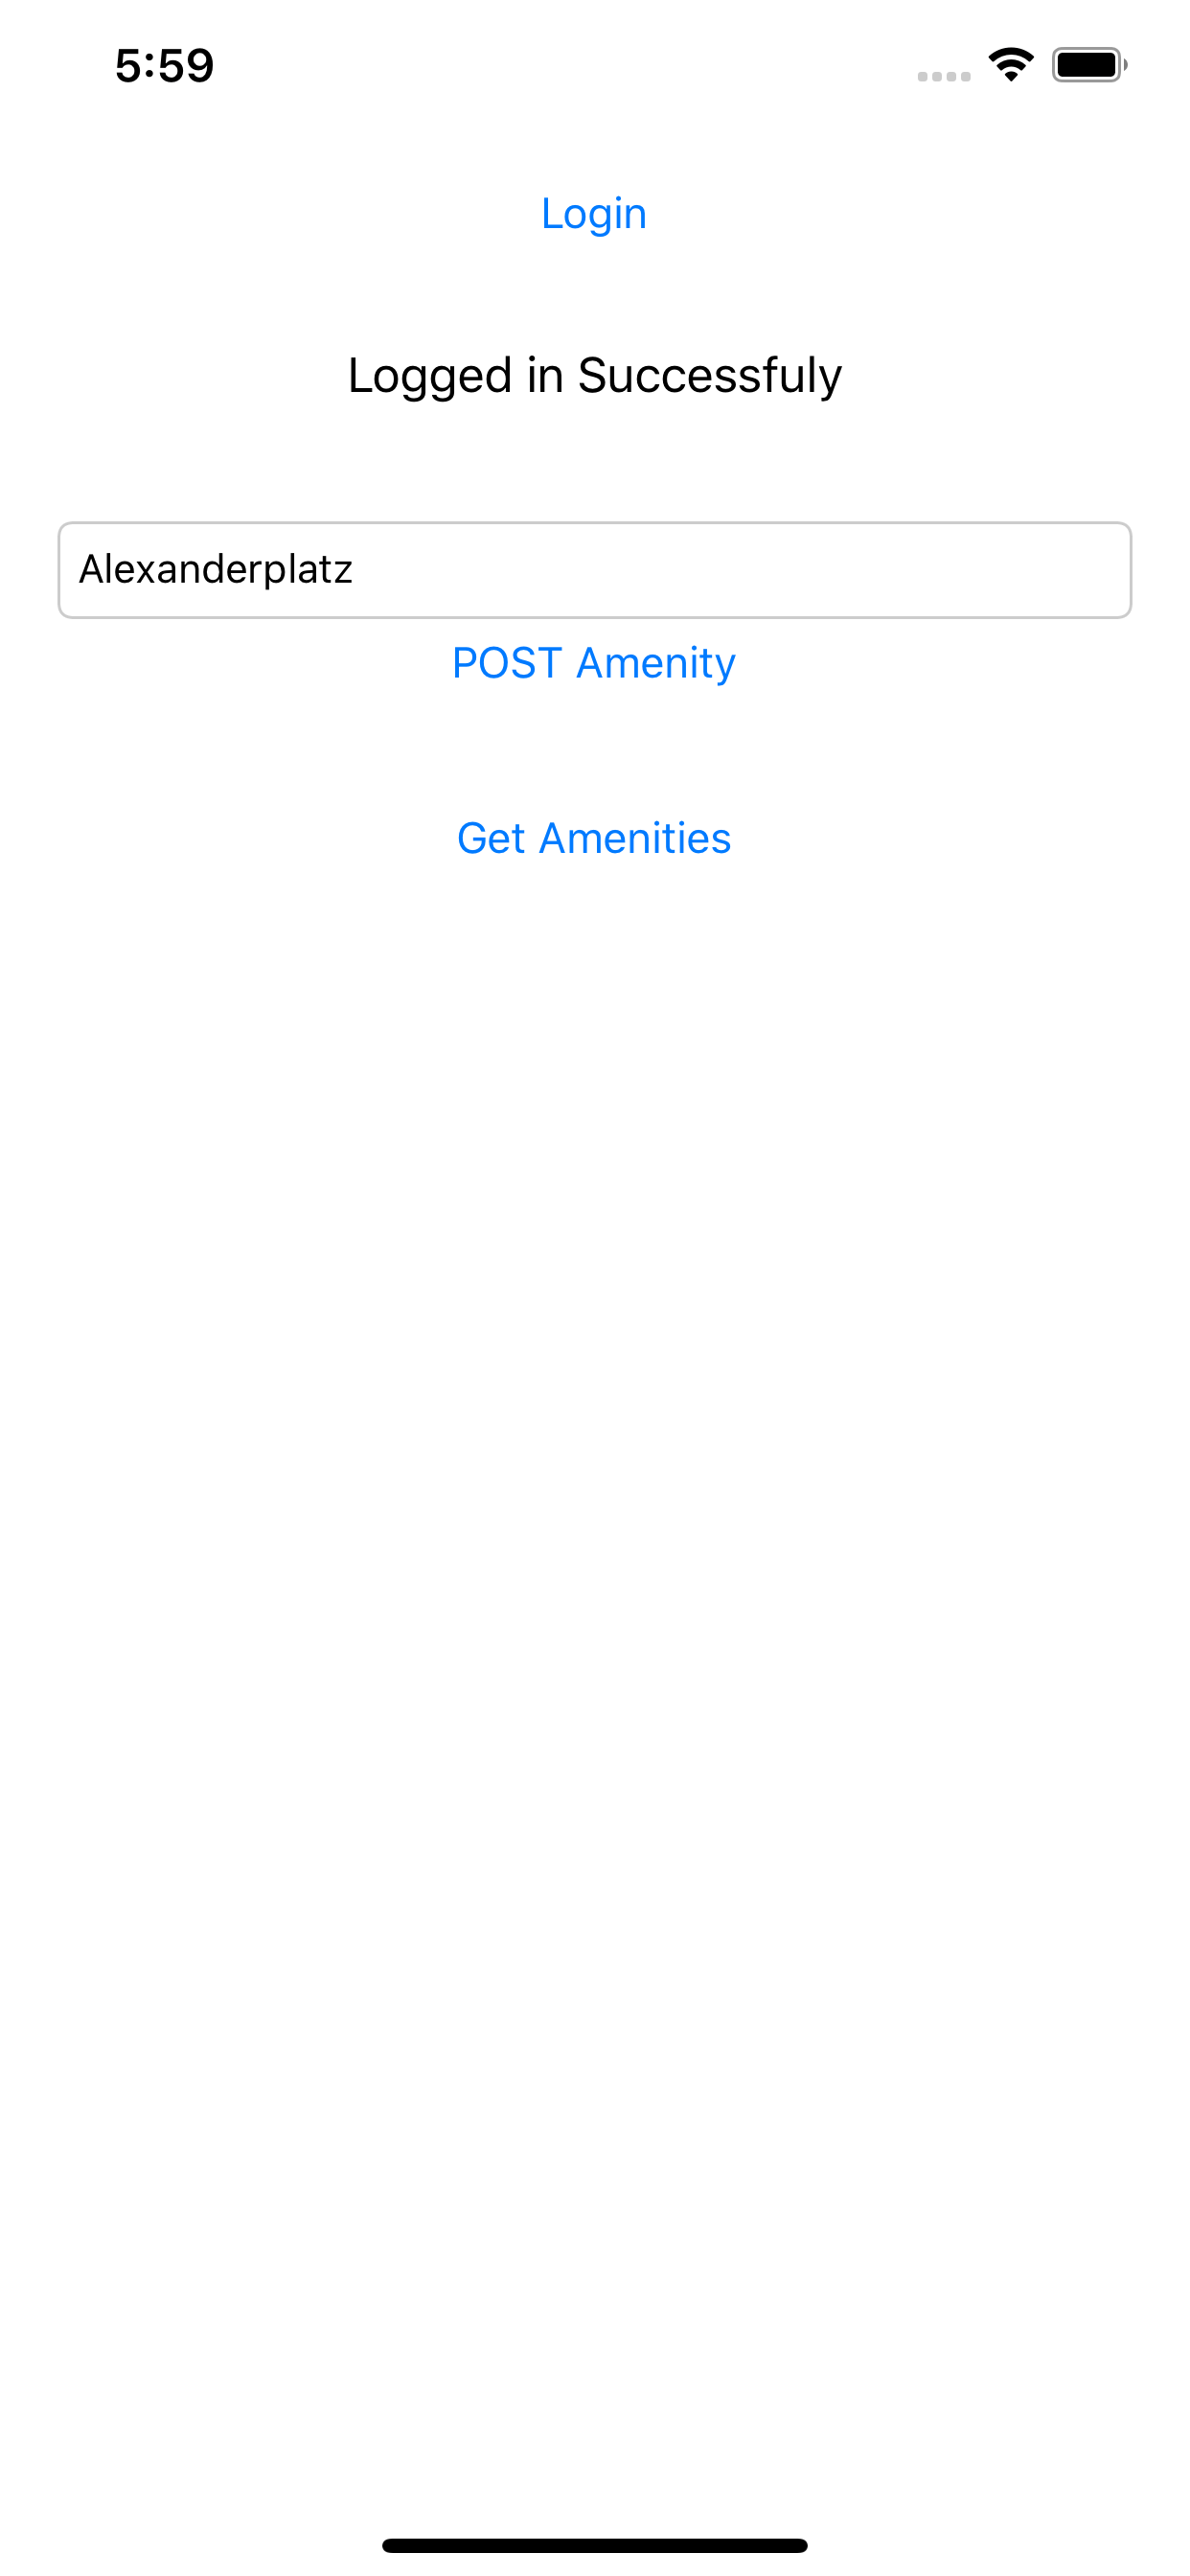
Create an Amenity
We’ll now create an amenity with the title “Alexanderplatz”, and press the POST Amenity button. This will enable us to POST a new resource to the API server. The postgrest service verifies the signature of the JWT with Auth0 and only if the signature matches, it’ll allow the POST operation.
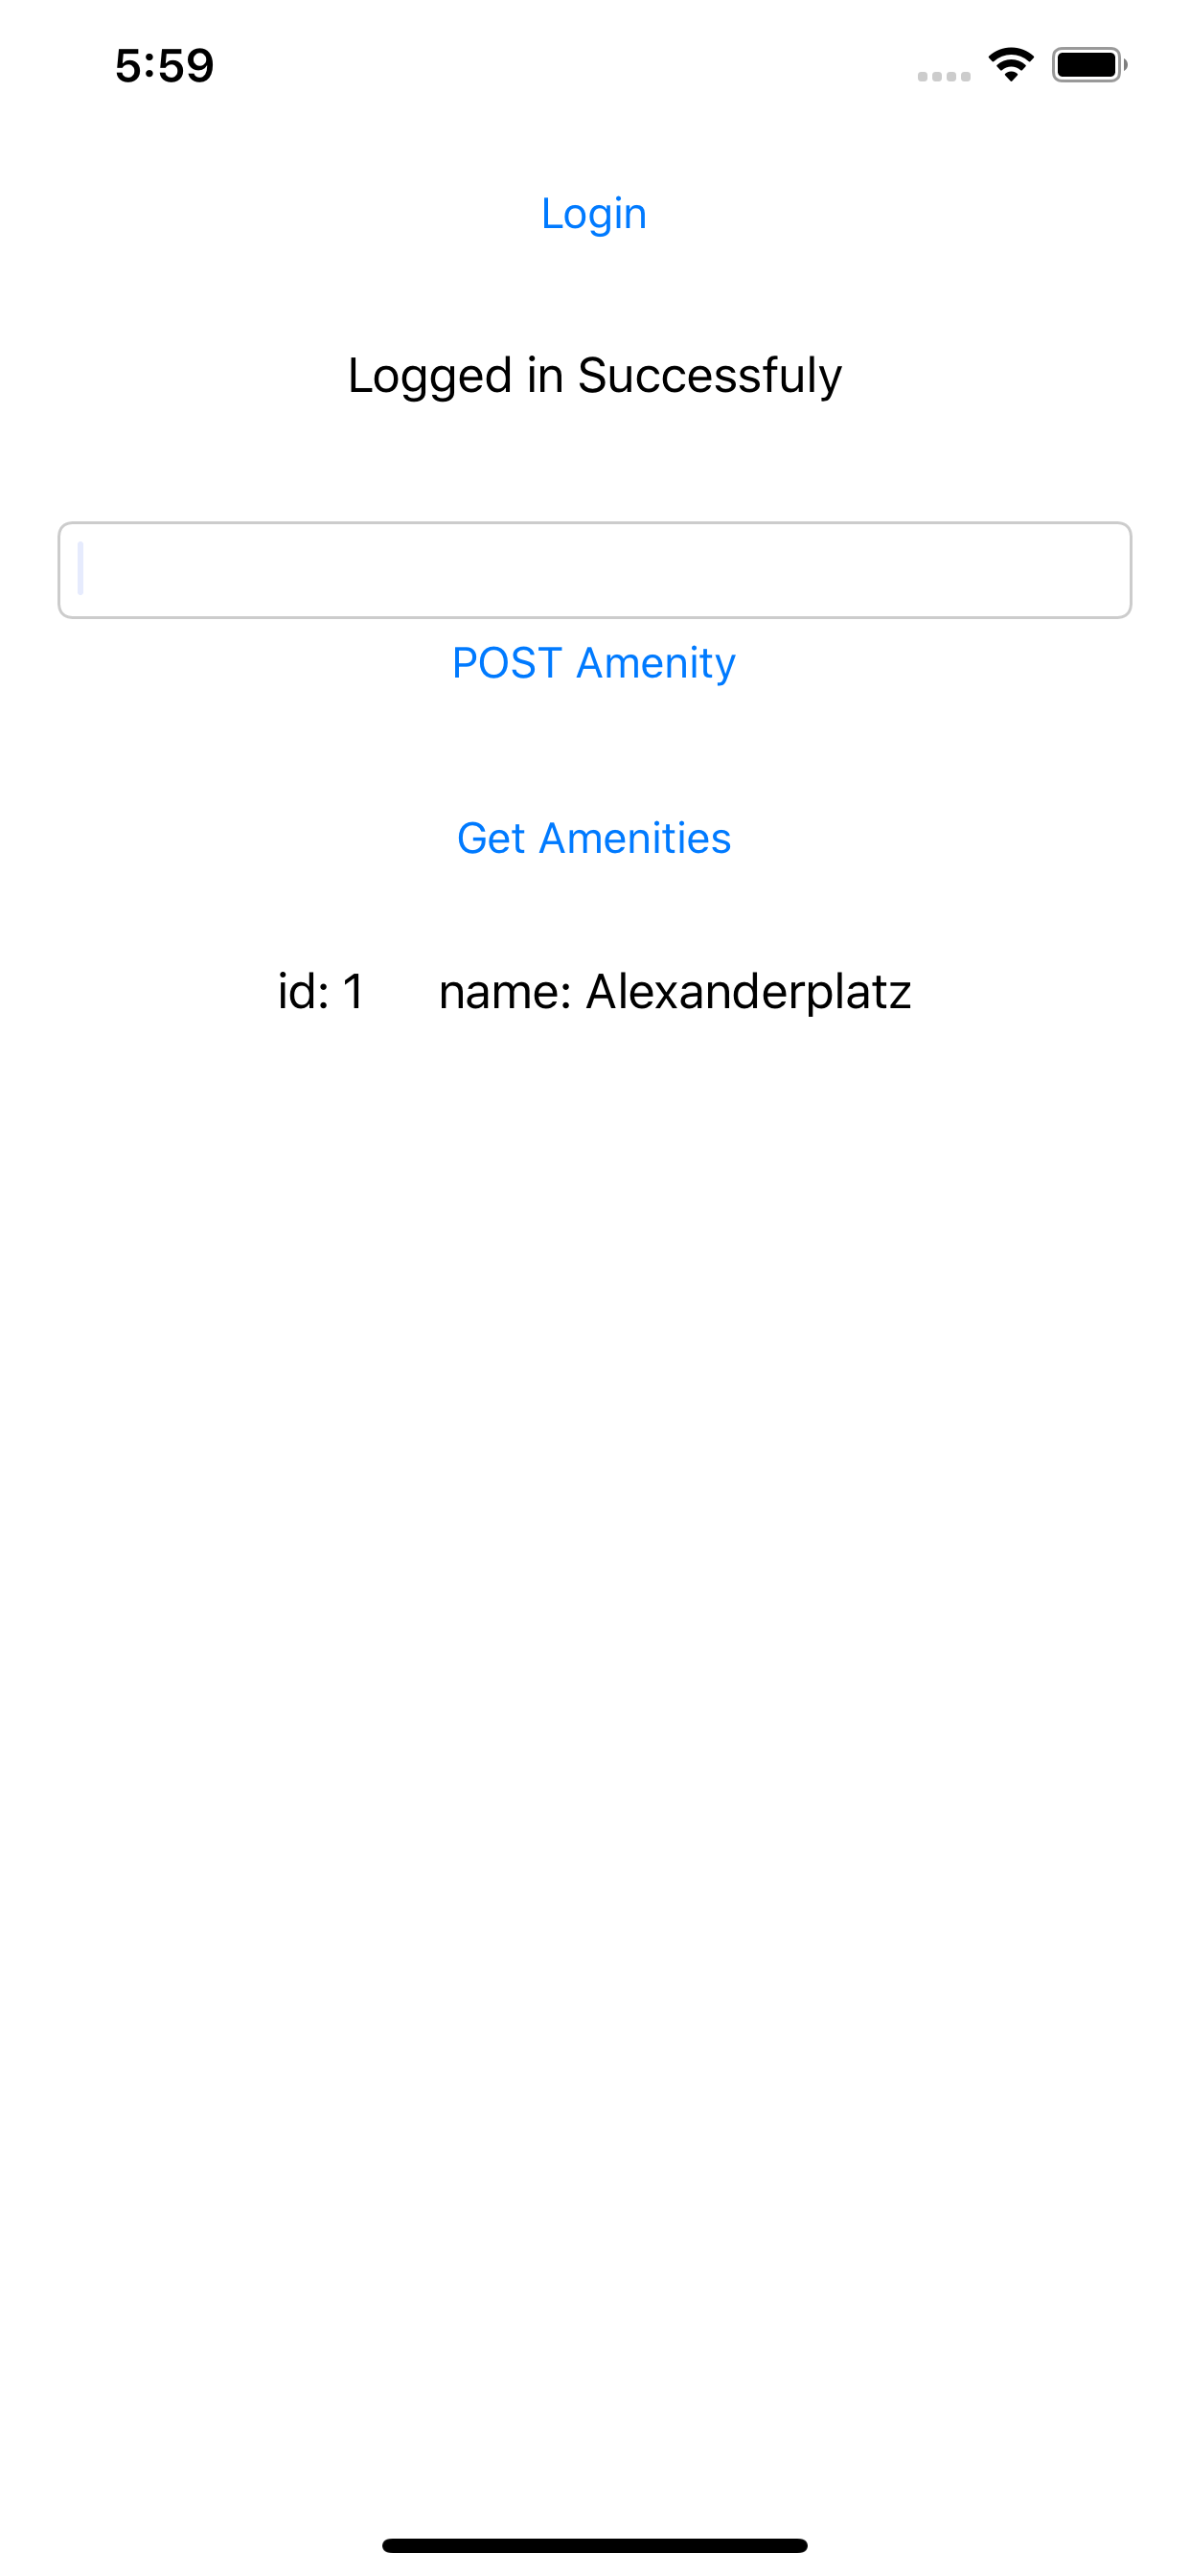
List of amenities
If we press the Get amenities button, we’ll see a list of all the Amenities that are available. Since the api_anon has read rights on the DB, a valid JWT isn’t needed to read the API. This can be changed in the init-db.sql.
But does it really work?
To prove that the Postgrest does verify the signature, we need to spoof the JWT and try to POST a new amenity. If the Postgrest-Auth0 setup is working as intended, the POST should fail with HTTP 401.
Step 1: Create unsigned JWT
Head over to https://jwt.io to create a new JWT with the following JSON data.
{
  "https://postgrest-demo.de/role": "api_user",
  "updated_at": "2020-03-18T17:38:47.329Z",
  "iss": "https://<YOUR_DOMAIN>.eu.auth0.com/",
  "sub": "facebook|123456789012345",
  "aud": "<<Your Client ID from Dashboard>>",
  "iat": 1584553128,
  "exp": 1606780800
}
Step2: Modify the App
We need to make some minor changes to the app in order to use the unsigned JWT.
- Copy the JWT generated above and assign it to the variable
tokenat line# 25 inViewController.swift. - Comment out the line number 29 and 30 in the method
viewDidLoad()to enable the POST Amenity button.
Step 3: Test the changes
Run the app and you’ll see that the POST Amenity button is enabled. Enter a title for the Amenity, and click the button. You’ll see that the operation is not successful. This shows us that the Postgrest service doesn’t let an unverified token to modify REST resources.
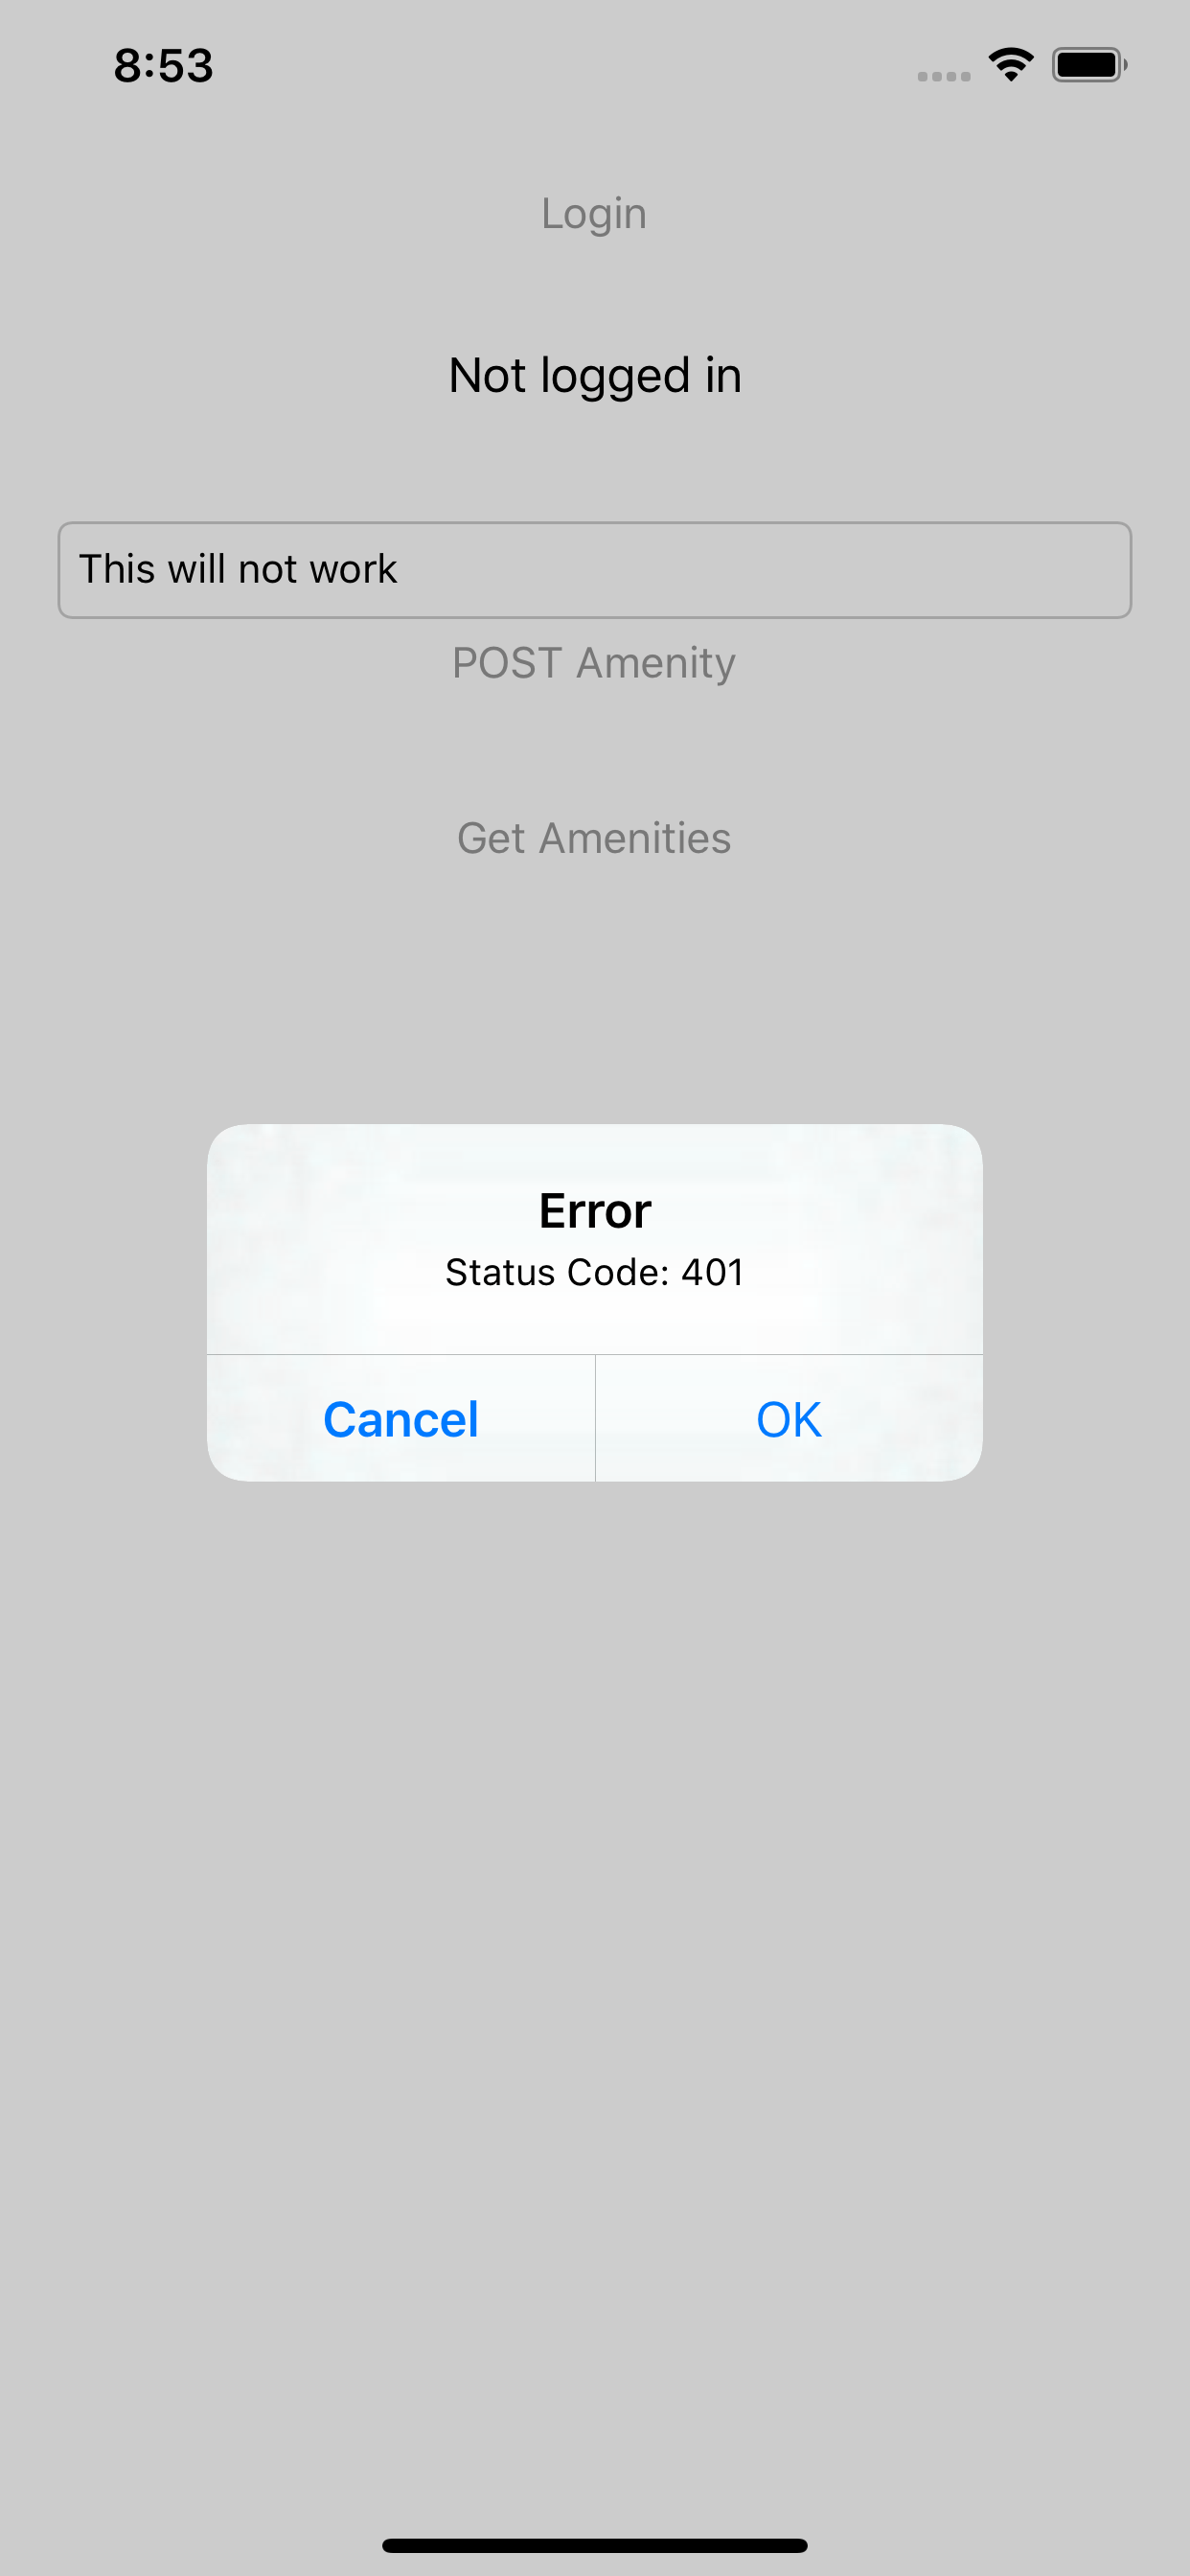
Unsigned JWT can’t modify resource
This concludes our tutorial on how to create an authenticated REST API within an hour, using PostgREST and Auth0.
Happy coding!